A Simple Pantry Refresh
If the kitchen is the heart of the home, then the pantry is the main artery 😉
I love organizing a pantry. Love it. Total nerd about it. But having everyone home 24/7 in 2020 … with the grand finale being a full holiday season with everyone home 24/7 … well, our pantry was feeling a little full and a lot messy. Now, I didn’t exactly start from scratch here, which is why this was a “simple refresh” for me. But, maybe you ARE doing a complete overhaul?! I did that with our pantry a few years ago, so this time around I simply needed to clean out, clean up and switch around a few things that were no longer working for us. If you want to completely organize your pantry from top to bottom – you’ll have a few more steps than I did, but the overall process is similar.
Before I share anything further, I have to say – this CAN be done on a budget. It really can. It will take longer (maybe a lot longer depending on your budget) and require patience, but it CAN be done. Not everyone has the flexibility to fully redo and reorganize all at once and THAT’S OKAY. I know that the current, popular design organization shows will show you a quick, one-day turnaround and a gazillion new containers (“product”), but it doesn’t have to happen like that – especially if you are working with a budget (and most of us are, aren’t we). When I first started buying containers for our pantry, I bought one or two each month. That’s it. I did the organization and clean out and had an overall idea of what it would look like in the end, but it happened slowly and gradually over time. I just didn’t have the $$ needed to shell out all at once on bins for organizing food, which lets be honest, wasn’t a need. It was a want. I have a desire within me for things to be organized, but I WANT them to also be pretty. I just took it slow and did what I could when I could.
I say all of that to take the pressure off. There is no wrong or right. It’s your home. Start where you are. Do as much or as little as you want. Think about your family and the way you use your pantry and need for it to work for you … then have some fun with it!
The Process:
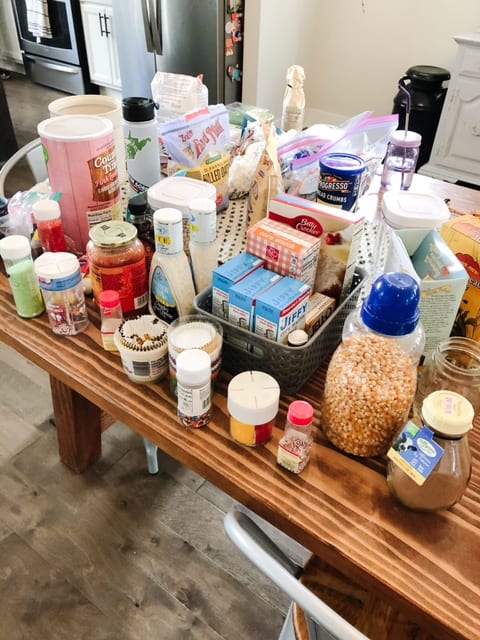
First, take everything out. Yes, everything.
Yes, this part sucks. It’s the most painful part honestly.
Next. Once everything is out – clean. Wipe down your shelves, vacuum, etc. Give it a good, thorough clean because, if we are being real, this doesn’t happen as often as it probably should.
Then, purge. What is expired? What’s stale? What’s old? What is no one eating but you’re holding on to it anyway? What’s messy (I’m looking at you food coloring). Toss it. It’s okay to be a bit ruthless. Bye, bye.
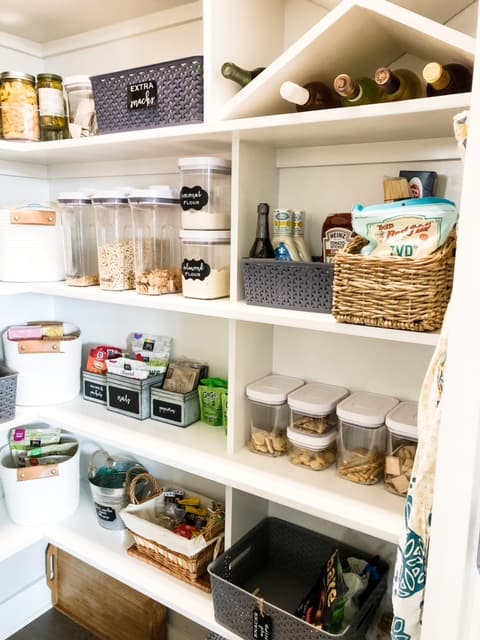
Think about the flow of your pantry. Step back. Study it. What do you use the most? What do you use the least? Where should your backstock go? What do little hands need to reach easily? How much do you want or need to see? Do you want containers for snacks, cereal, crackers? How many? Take measurements if needed. Make a list. Do you want baskets? How many? Some of this is going to be a personal preference. I, personally, love the process of emptying my groceries in their appropriate containers after I’ve been to the store. Love. It brings me a great sense of satisfaction, which I get might be weird to others. That’s why this is personal. It’s okay if you want to skip the containers and just line your cereal boxes up in a tidy row. You do you.
Shop! But, before you do, take a minute and shop your home. I’m a huge fan of shopping my own home. There may be baskets or bins that you are no longer using that you could repurpose in your pantry. Hit up a store. {The Container Store is great, but I’ve always been able to find everything I need and want at Target.} Shop for the items that you want to get yourself started first. Remember, you don’t have to buy everything at once. Start with what makes the most sense to actually help you organize and worry about “prettying it up” later. Plastic turntables work great in corners and tiered clear stands are great for organizing cans.
Lastly, start putting everything back. But don’t feel like you need to put them back in the SAME PLACE. You’ll feel the urge to do so. I’m not sure why. Fight it and give it a new home if it makes more sense. Keep like items together and consider storing baskets of grab-and-go snacks on lower shelves where everyone can reach. Try it out and rearrange if needed. I rarely get it right the first time I put everything back in. It’s okay to spend some time trying different arrangements.
Things to Consider:
- It’s great to have baskets or containers to hide a lot of your backstock (new food items that you don’t need yet, extras, etc)!
- Consider a container for plastic cutlery and items that you only pull out occasionally and store those on a higher shelf. Same for birthday candles, disposable containers for dropping dinners off to a friend (it’s an awesome bonus when they don’t need to worry about returning dishes!), and other random items that you have, don’t want to toss, but don’t need to keep out. For example, we have a little bin full of Pez dispensers. My kiddos love to pull them out and play with them.
- Consider bins for baking supplies, cookie cutters … a S’mores station, etc. What do you use together – group like items together.
- You can keep appliances in the pantry as well if you have the room and need to free up cabinet space.
- If it makes sense to you, it’s okay to keep non-pantry-ish items in your panty. We keep our dog food and pet care items in the pantry. It works for us to have these items right by the dog food and treats. They have their own basket and are separated from our food items. This works for us. What works for you?
- Have fun with it!
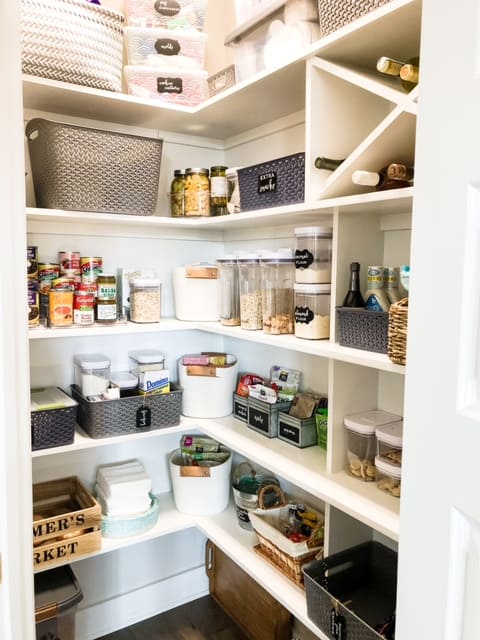
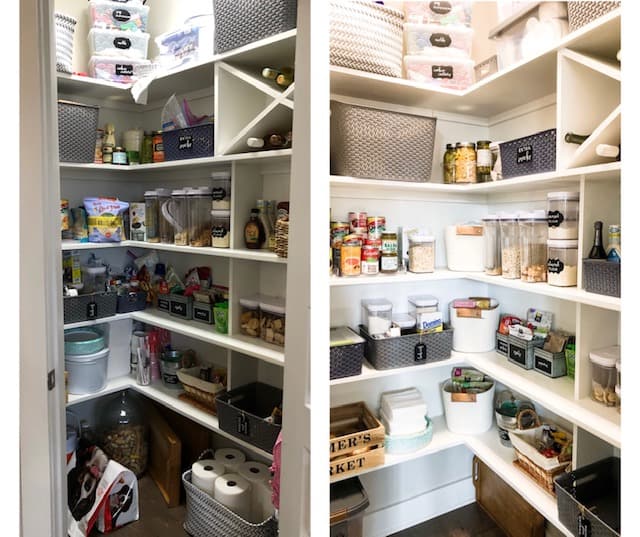
Here’s our subtle before/after photo! I wish I had a before-the-before shot, but I haven’t found a photo of that yet. I’ll be sure to share if I find it!

Shop This Post